More planning for my final animation project
I have done some more planning for my final animation by stating what my final animation is which will be a stopmotion animation of a snail climbing up the side of a pot, going across and then back down. My poll I did on how I should make my stopmotion animation has shown that lego with a sunny sky as the setting was the most popular result for making my characters for my final animation project.
Here are my concept drawings for my final animation

For my first concept of my snail for my final animation, I wanted it to look realistic while also having that lego look to it. Looking back at this drawing, I feel that the face looks more like a bunny rabbits face with the two tall ears when they’re mean to be antennas and the shell then makes itself look out of place. Next time, I will try to make my snail look more natural.

For my second concept of my snail for my final animation, I went back to basics and drew what I thought what a snail should look like. I feel now that I look back, I could of added some more detail that could help me depict what my snail could look like when it is in my final animation.
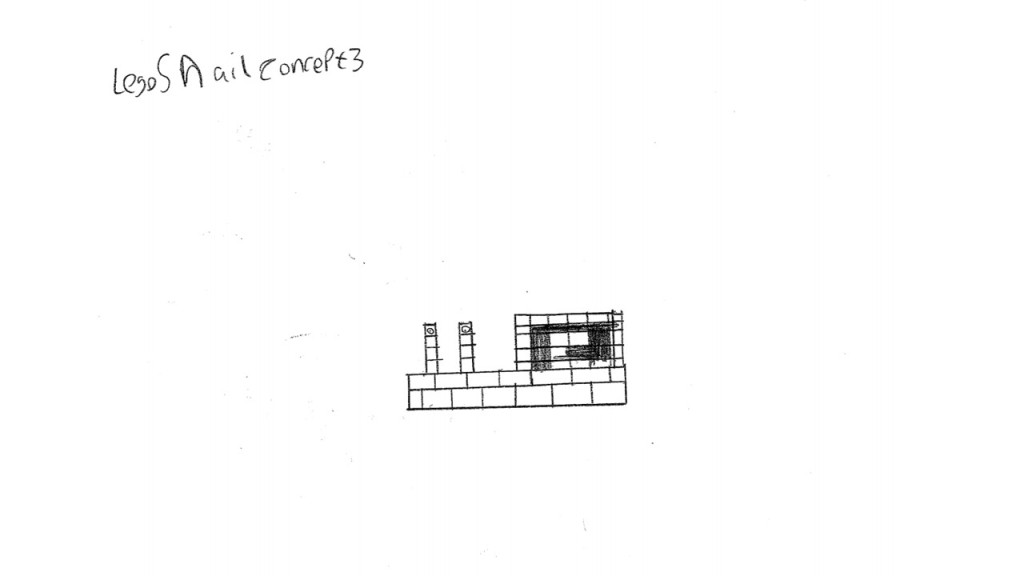
For my third concept of my snail for my final animation, I realised if I was going to make my snail out of lego, I would have to draw a concept of a snail being built from legos so I could get a clear picture of how I could build my snail and plantpot. I am going base my snail design off of this concept drawing when it comes to building my snail.

For my first concept of my plant pot for my final animation, I wanted to replicate the look I used for my third concept drawing of my snail. Looking back, I could of made the lines straight and more tidy as it makes it look unfinished and like a doodle.
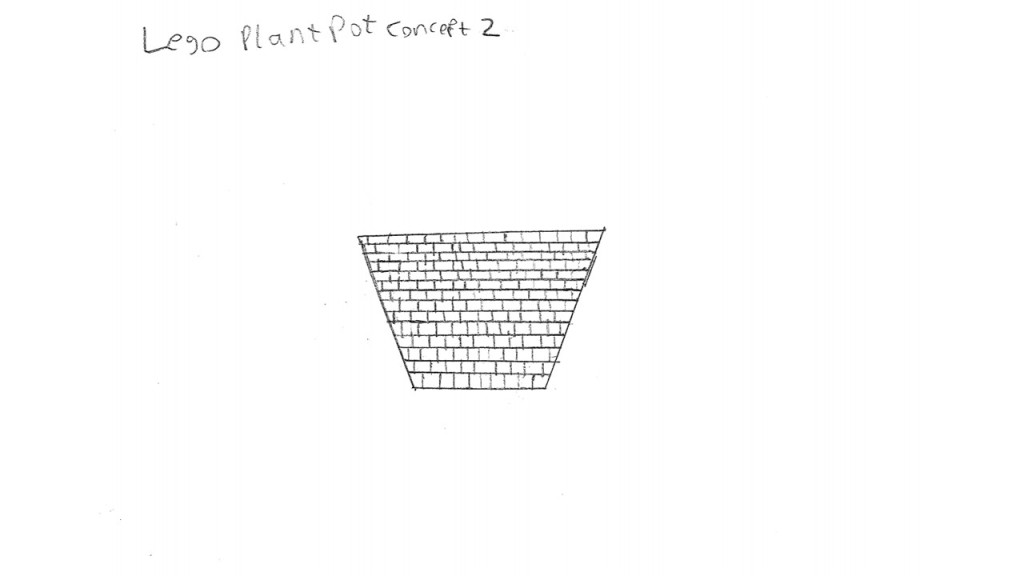
For my second concept of my plant pot for my final animation, I wanted to improve on my first concept drawing by making it more tidier so people can see more clearly of what I wanted my design to be at the time before I did my third concept drawing. I feel looking back, I could of made the sides look blocky so it looked more like a lego plant pot.
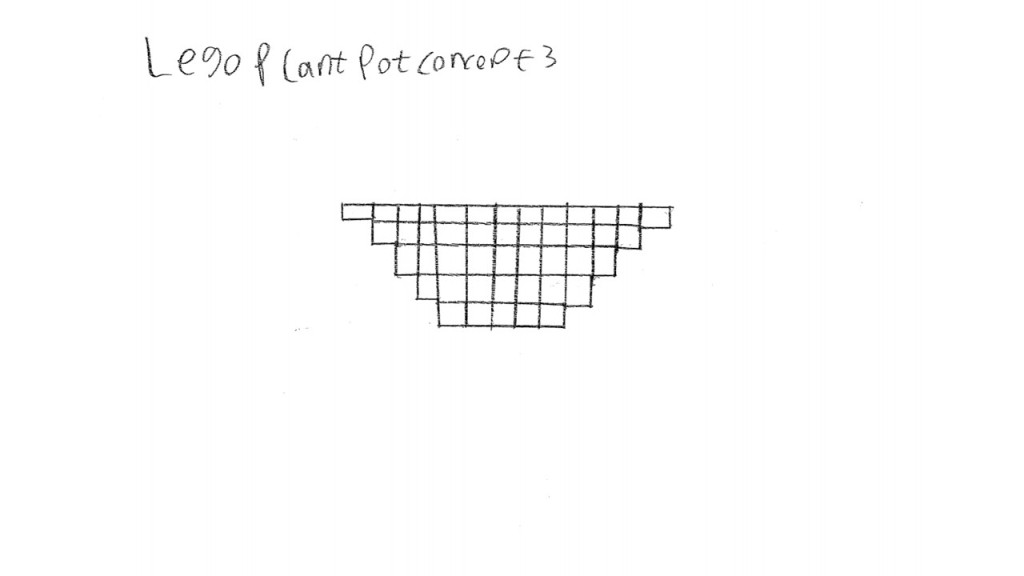
For my third concept of my plant pot for my final animation, I wanted to start from scratch and come up with a new design that made the whole pot look blocky and as if it was made out of lego bricks. Looking back, I’m wondering about how I will be able to put my snail on the blocky bits and if it will fall off.
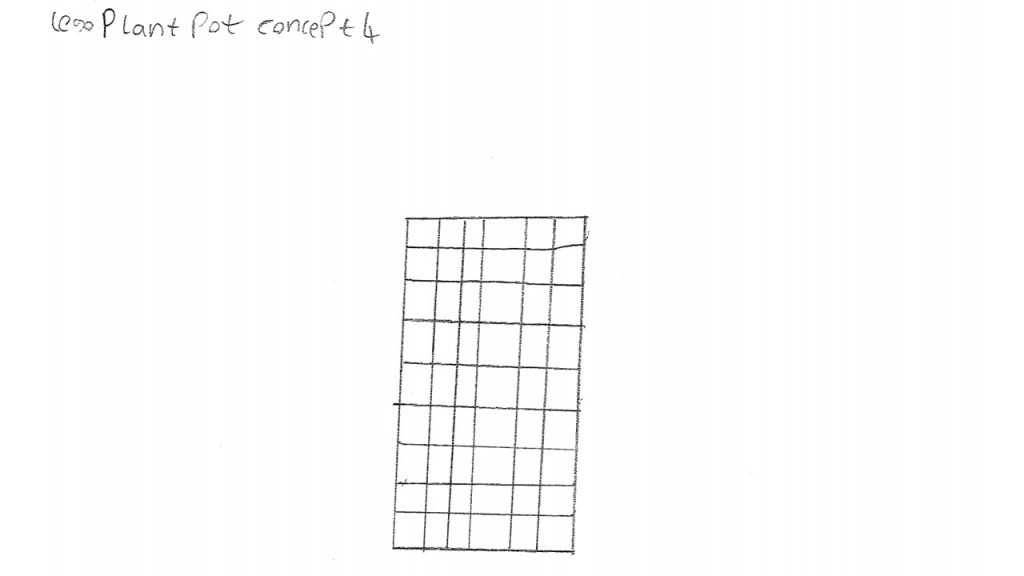
For my fourth concept of my plant pot for my final animation, I wanted to have a design where my snail could go up the side and be held there with blue tack for the next shot. Looking back, this one does look the most basic out of the four but I am going to use base my actual Lego pot off of this design so when it comes to moving my snail in between shots of my actual shooting of my final animation, I can stick blue tack or white tack under my snail and stick it to the side of the pot and then just take it off and then stick it back on slightly higher or slightly lower.
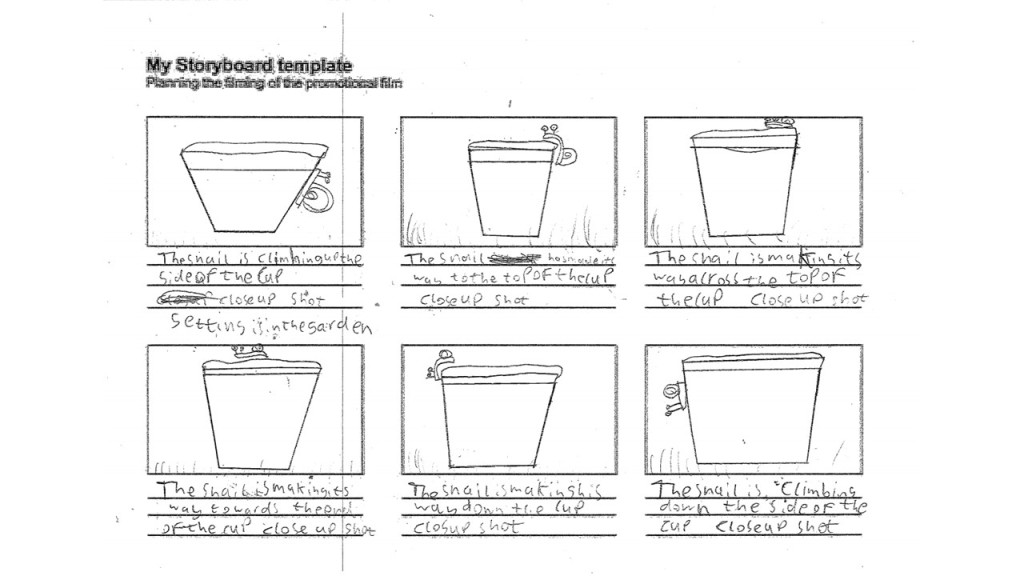
I wanted a realistic look on how I wanted my final animation to look like and I feel like it went rather well. This was before I got my questionnaire results back which is the reason I did not create a lego themed snail or plant pot. Looking back on this storyboard. I feel I could of improved my handwriting as it is difficult to read the description of whats happening in each scene.
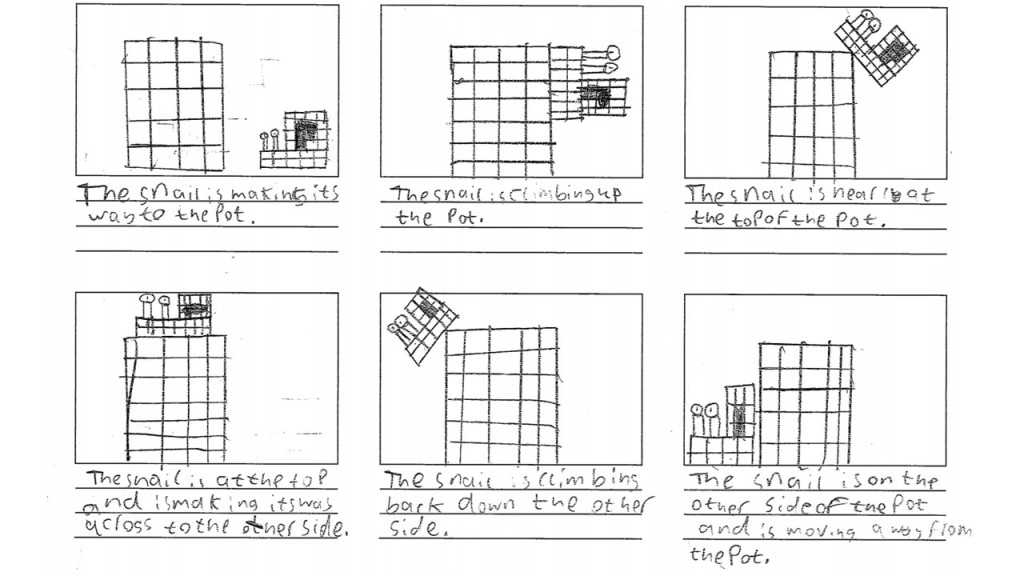
After I got my results that show lego with a sunny sky as the setting was the most popular result for making my characters for my final animation project., I made another storyboard, this time with a lego theme. I used my third snail concept drawing for my snail and my fourth plant pot concept drawing as my plant pot for my designs used in each box of my storyboard.
Sunny sky setting research and inspiration
For my setting, out of background of mountains, sunny sky and a beach, sunny sku was the most popular result in the question what setting do people prefer the most that I created in my animation questionnaire. And as a result.. I have got a few images I used as research and inspiration for my design of my sunny sky setting.
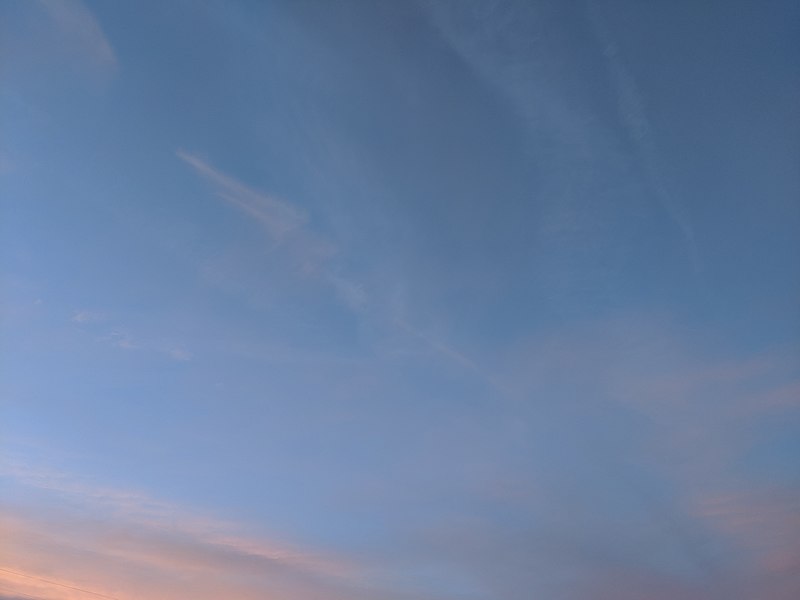
For my first image I used for research and inspiration for my background for my final animation, I found this blue sky with orange tint at the bottom image. I liked it as it gives off a nice blue colour and I used this as the colour for my blue sky when it comes to drawing my background for my final animation.

For my second image I used for research and inspiration for my background for my final animation, I wanted to add a bit of grass in my final background and started looking for different shades of grass on the internet and found this image. I liked this images as it has a really good and natural shade of green to it and I used this image as inspiration to try and get a green similar to this image in my background for my final animation.
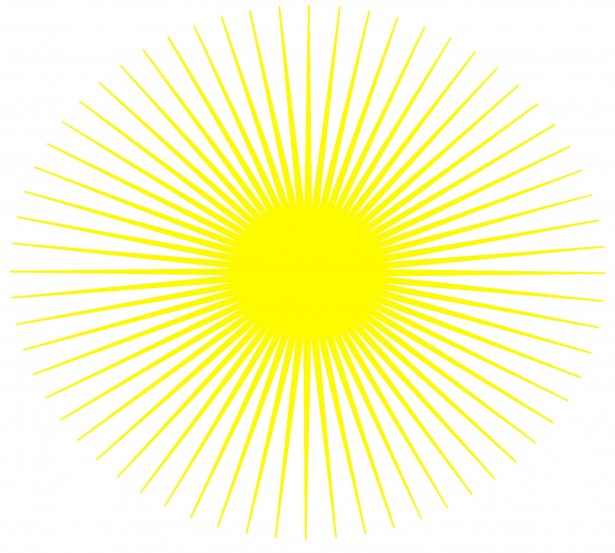
For my third image I used for research and inspiration for my background for my final animation, I wanted to find a good shade of yellow I could use for when I was going to draw my sun. I like this image as it has good yellow shade to it and used it as inspiration by using a yellow based off of this colour when it came to colouring in my sun.
Here is my final drawing of my setting of a sunny sky. For my sky, I used the closest blue I could to the sunny sky image I found. One problem I had was that I was beginning to run out of blue pen and so that is why the blue sky looks lighter at the top. Looking back, I feel it has worked out well as blue sky can tend to be quite light shaded if you look right up at the sky and then as you look lower it can tend to get more darker. For my sun, I feel my shade is too yellow and doesn’t look very natural. On the other hand, I feel that it has an extremely similar if not almost the same shade of yellow that is in the sun image I was basing the shade of yellow from. For my grass, I feel the shade of green is a bit too light which I feel makes it look unnatural.
My objects used in my final animation
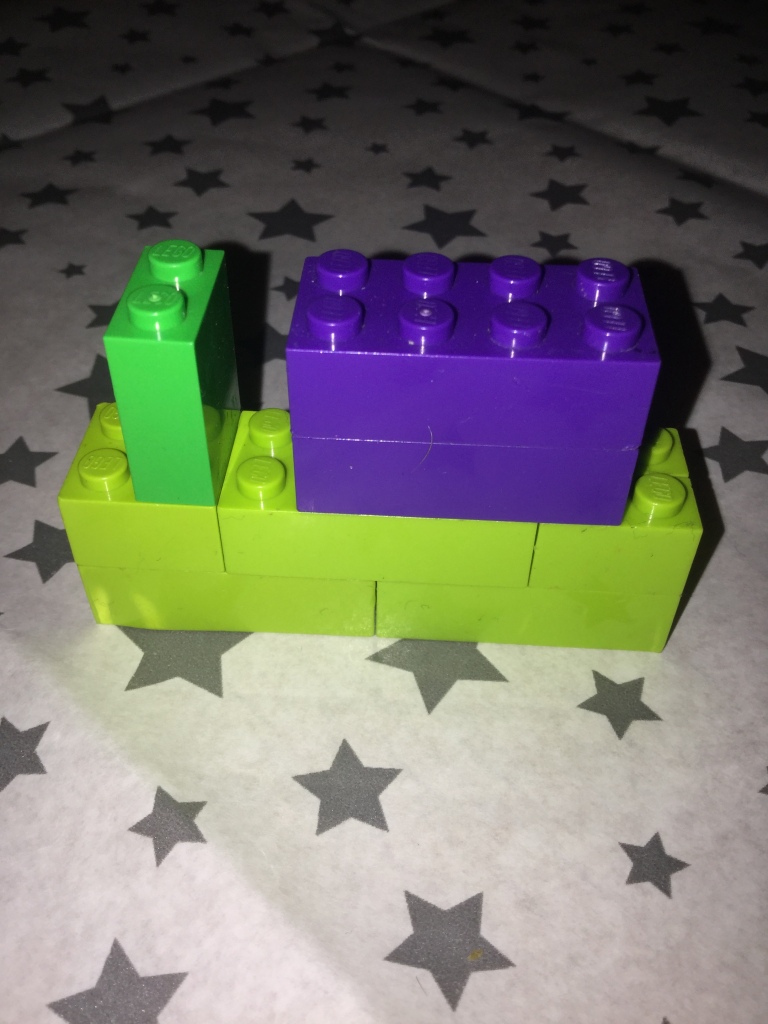
This is my lego I built for my final animation. I based the design off of my third concept drawing of my snail. I feel looking back that it looks rather simple and lacks the real size of an actual snail but I feel I could get away with the size issue as it is lego and usually when you build things out of lego, they aren’t made to look realistic or bare realistic features. I also feel that it does look a little basic now that I look back and that I could of added eyes to the snail like as my third snail drawing concept (the design I based my lego snail on) has eyes.

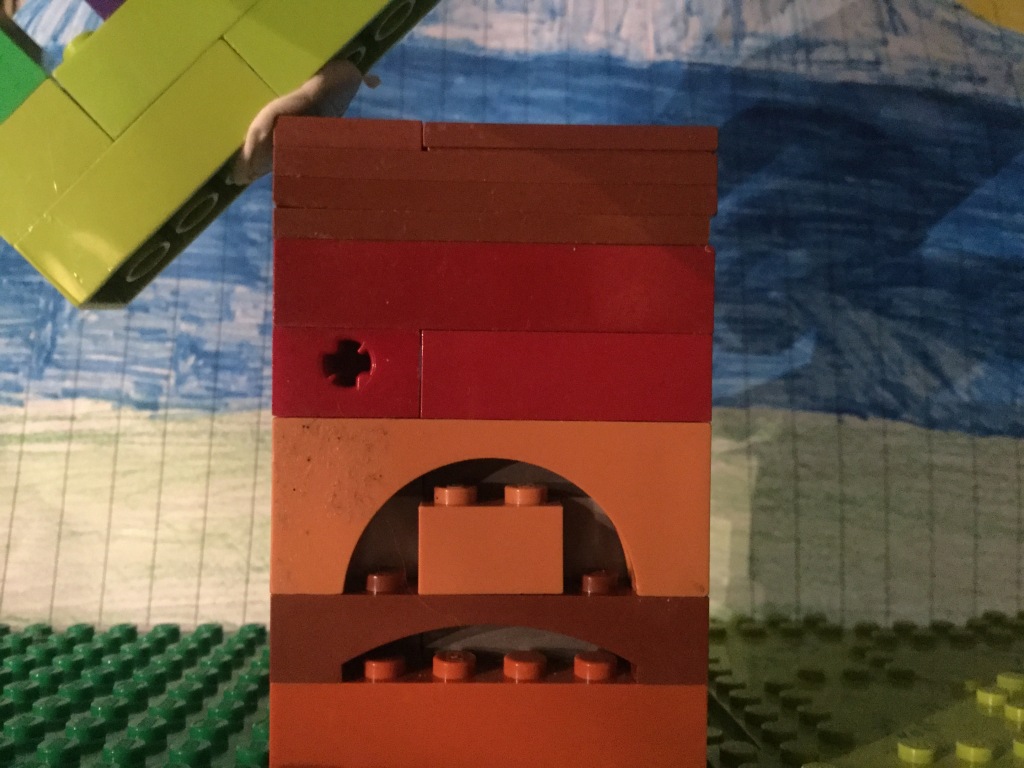
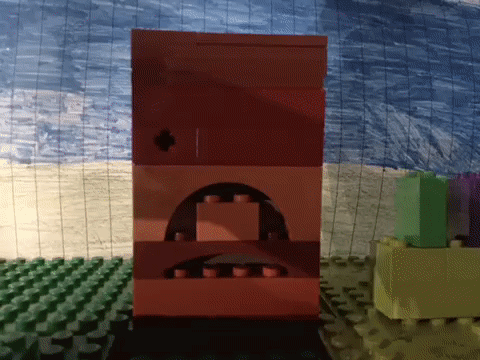
This is my lego plant pot I made for my final animation. I based this design off of my fourth concept drawing of my plant pot. Looking back, I feel that I could of stuck to one shade of brown and that I could used the same lego pieces as well as there are a few holes in the pot I made.
Why I chose my idea for my final animation
I chose my idea of a stopmotion animation of a snail climbing up and down a plant pot as I felt originally that it was a simple and quick idea to make but I quickly realised that making anything with any type of animation requires a lot of planning and setting up. When I was making my final animation one problem I had was was that when I did my first attempt of shooting my final animation. My plant pot kept falling over due to the weight of the snail. To solve this issue, I attached a lego board underneath my pot as shown below.
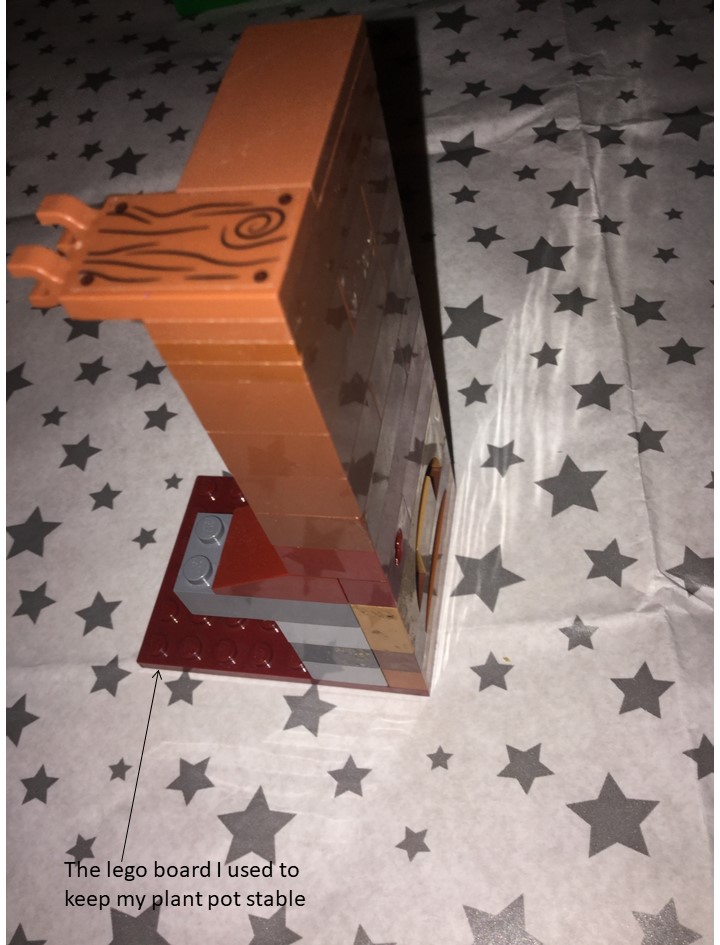
This helped a lot with the stabilization of my plant pot when my snail was being mounted to it and prevented it from falling over.
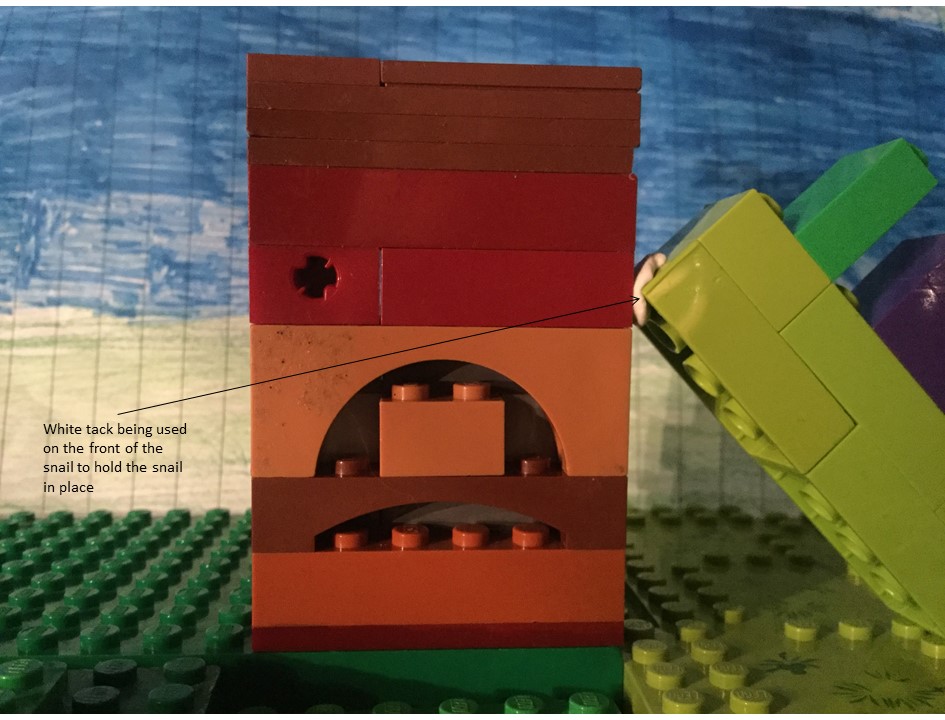
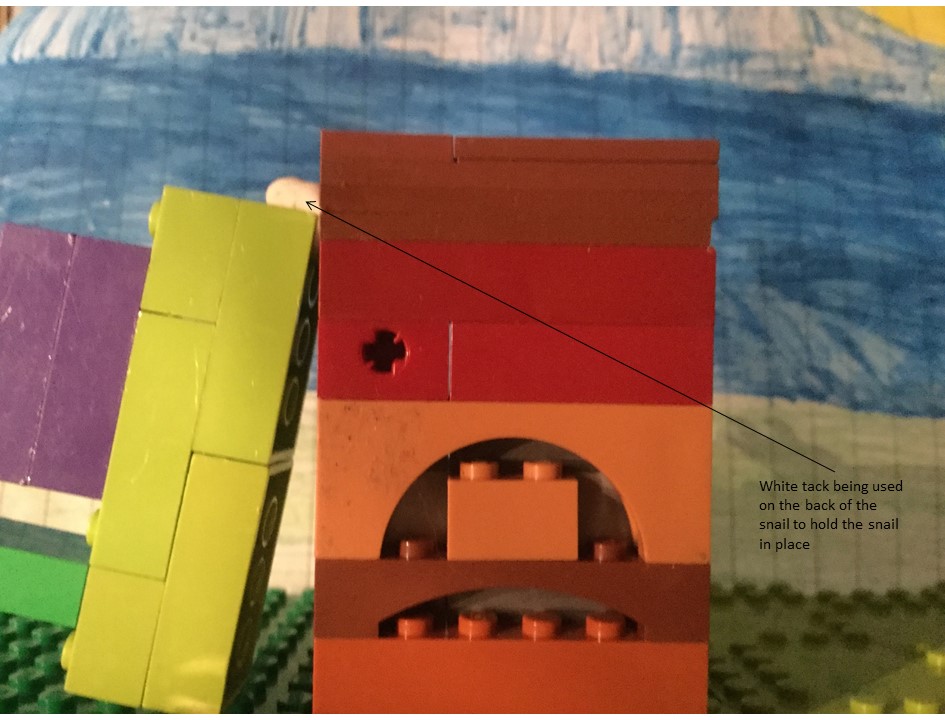
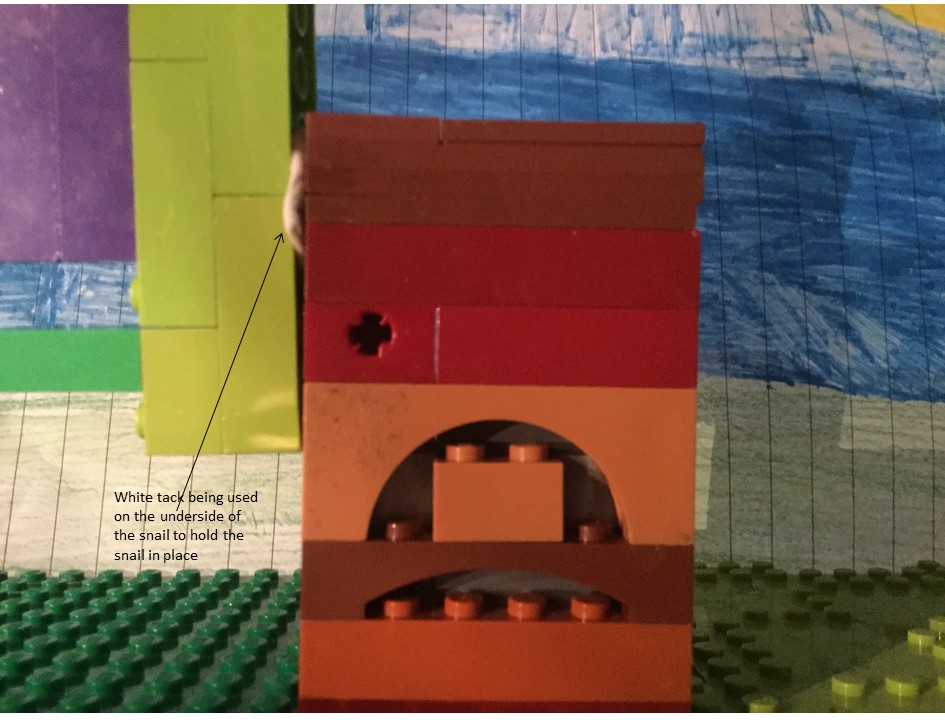
Another problem I faced during my animation was how I was going to get my snail to be mounted on the sides of my plant pot without falling off as shown below.
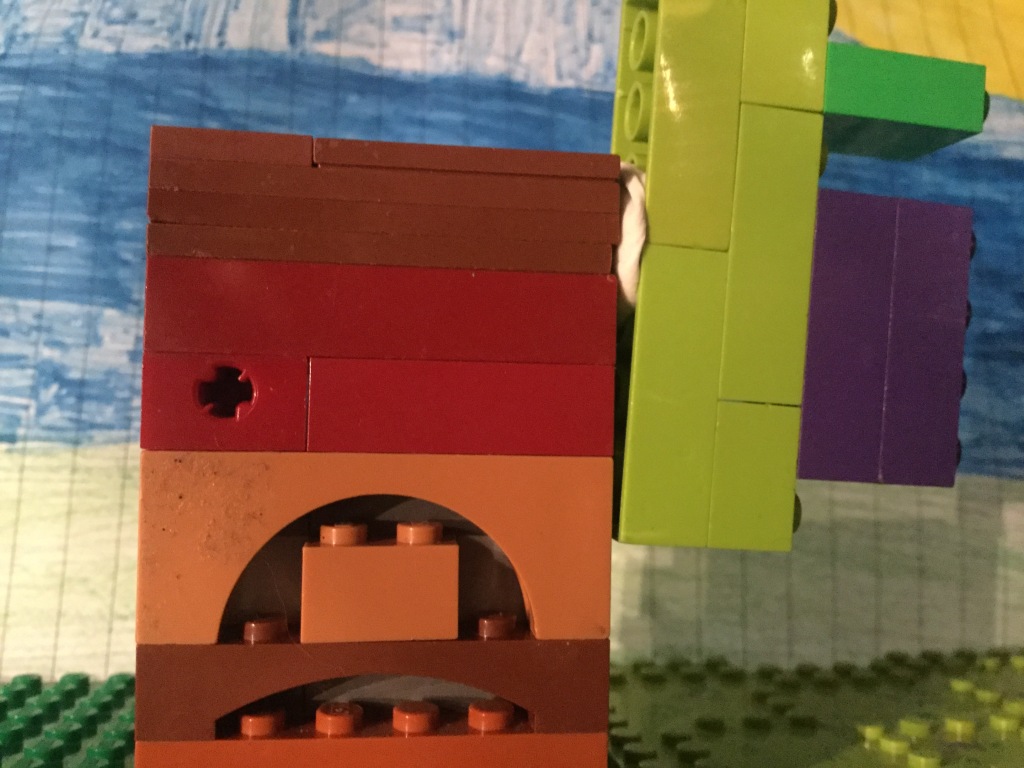
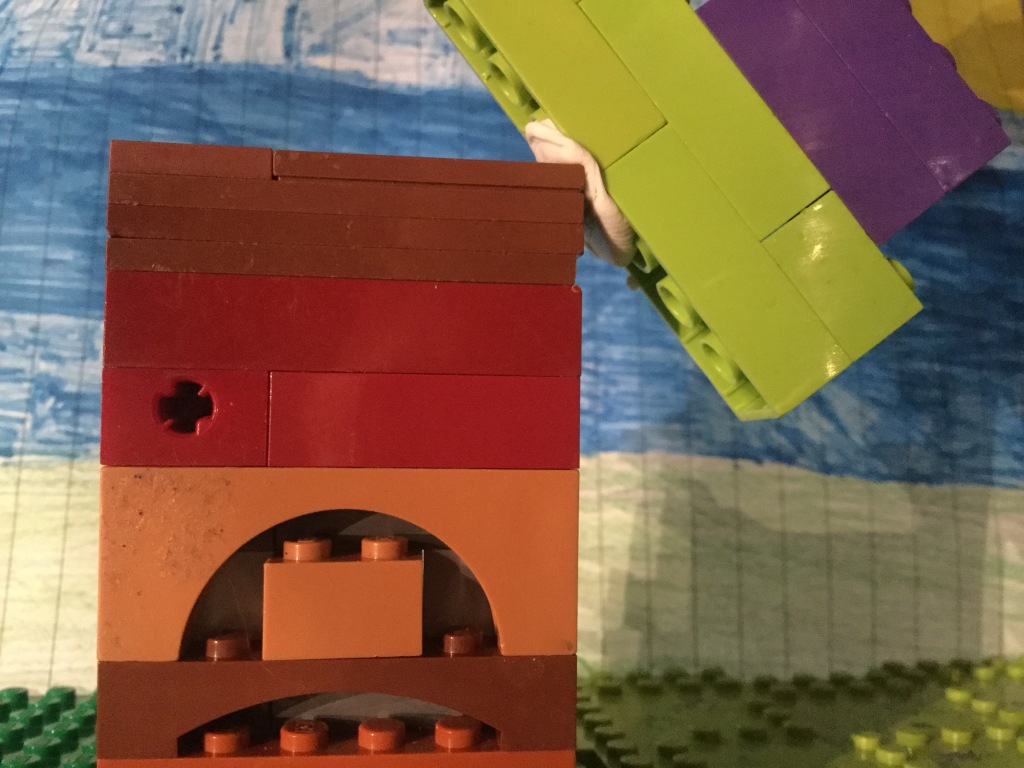

I ended up having to use white tack on the underside of my snail rather than attach it at the side of my plant which would then connect on to my snail but every time I tried to this, the snail kept falling off as the white tack couldn’t handle the weight of the snail so attached it to the back, front and the underside of the snail too as shown below.
I feel that shooting my animation went rather well, even though I had a few problems, I got round them by using things like white tack and a board for the underside of my plant pot so it was more stable and that it didn’t fall over.
Resources I used to make my final animation
I can animate 2 – taking each frame via a webcam

Adobe Photoshop CS6 – putting all the frames in and exporting it to a GIF file

Lego – building of the actual objects used in my final animation
Pencil and paper – used to draw concepts of objects that I could use for my animation.
I feel like this meets the criteria I set myself from unit 1/part a as I have made my idea a reality through the making of my final animation. I also feel this way due to the fact that I feel my idea has mostly turned out the way I said it would be in unit 1/part a and the way I wanted it to be in my mind.
My final animation
Here is my final animation. The reason why I wanted to have this idea because I wanted to have a nature themed and natural looking animation. I’ve learnt during the making of this that setting up any animation requires a lot of time, effort and setting up and that a stopmotion animation requires a lot of patience as you are adjusting your objects ever so slightly for each frame and if you get it wrong you have to redo that frame and if you are not happy with a lot of the frames you took then it can consume a lot of time as you have to redo the frames you’re not happy with. Some challenges I faced were issues like my lego plant pot falling over and my snail being to heavy for my lego plant pot to hold on its own so I had to use white tack to hold it in place which unfortunately, you can see while my final animation is being played back. If I could redo everything then I would probably have changed the way I built my objects and the way I drew my setting/background. I would of also used a smaller amount of white tack so that it can’t be seen as well when my final animation is being played back.
Overall, I’ve enjoyed this animation project a lot. Especially when it came to planning everything. I felt that I could be creative and express myself through not only my final animation but my concept drawings. I am excited to do more projects in the future like this and am looking forward to be able to express myself more.
